The topic of professional-looking sheet music has come up in every discussion I have with my students about arranging. A clean score not only communicates a composer or arranger’s ideas, but also saves rehearsal time, making ensembles better! I have learned many tips and tricks through the years while editing my marching percussion scores. The following list addresses and provides solutions to notational concerns I’ve frequently observed with marching percussion scores.
Using Rhythmic Notation for Suspended Cymbals on Mallet Instruments
In marching settings, many mallet instruments sport one or more attached suspended cymbals. It is important to make cymbal notes distinct from normal melodic notation. For this I use Rhythmic Notation listed under Staff Styles. Choose the Staff tool and highlight the measures containing suspended cymbal notes. Right-click your selection and choose 2. Rhythmic Notation. This will give the cymbal notes a distinct visual appearance, avoiding the need for constant instrument labeling. I find it especially helpful because the MIDI pitch information is not changed: only the look of the score is.
It is also possible to use rhythmic notation in different layers, but this needs to be done manually. Choose the Staff tool and choose Staff > Define Staff Styles…. Click New to the right of Available Styles to create a new staff style. From here, next to Alternate Notation, click Settings…, select Rhythmic Notation, and next to Apply To, select the appropriate layer from the dropdown menu. Be sure to name this new staff style, after which you can apply it to the staff or a measure region.
Whether you are switching instruments to achieve cymbal playback, or using the included sounds from Tapspace’s Virtual Drumline, rhythmic notation is sure to clean up the score and make switches to cymbals easier to understand.
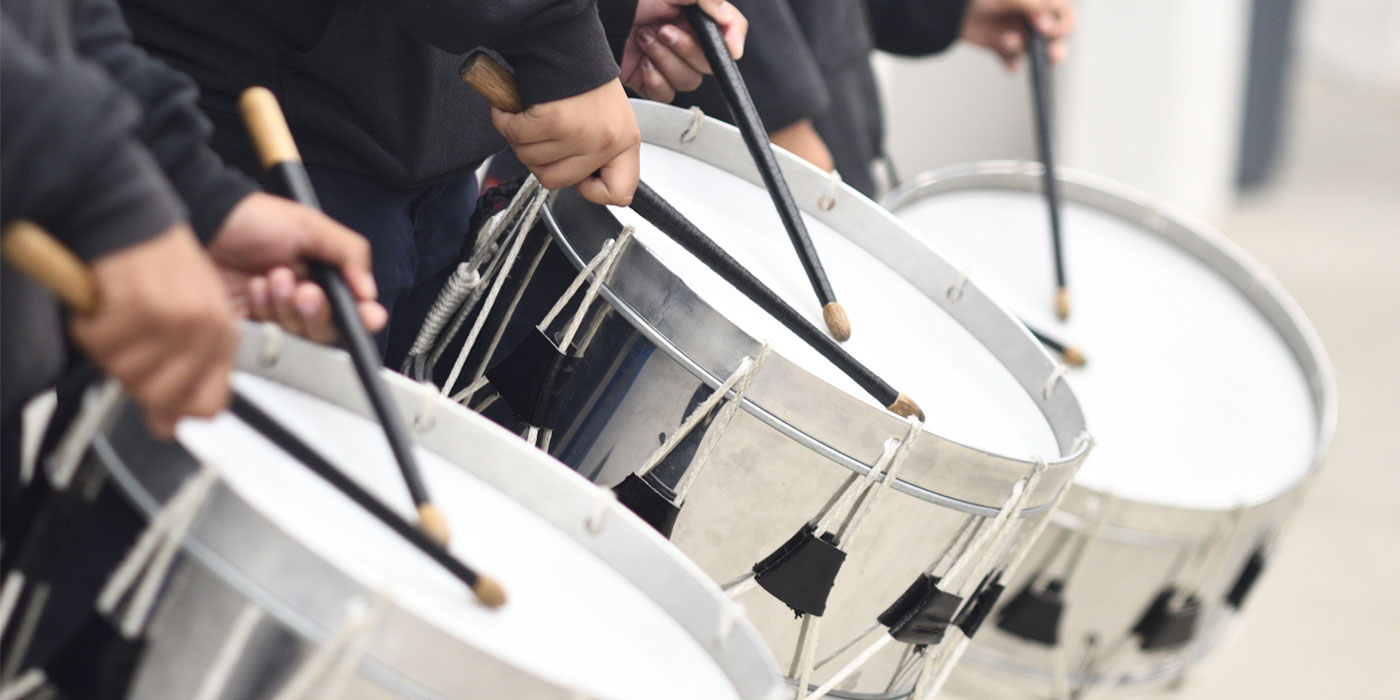
Using the Lyrics Tool for Stickings
A pet peeve of mine is a drumline score without any stickings, markings for which hand should play each note. While some arrangers may feel that this work should be left to the instructor, it places unnecessary stress on instructors (if the school has any) who already teach multiple charts and have to judiciously manage their time. Instructors can still make decisions about sticking if it is notated anyway. In short, stickings must be included for a professional score.
The easiest method of including stickings is to use Finale’s Lyrics tool. Using this tool, you can treat stickings as lyric syllables, attaching an “R” or “L” to each note; even as the music shifts around, the stickings remain attached to their notes, contrasting with a text frame, which might have uneven spacing and stays in the same spot on a page instead of with a group of notes. The Lyrics tool easily adjusts large amounts of stickings simultaneously and consistently. I tend to use capital letters for accents and lowercase letters for non-accented notes, but this distinction is not important. Stickings are not needed when implied, such as the middle of rolls or double-stops with a double notehead.
If you use this method, be sure to turn off word extensions: choose Document > Document Options and select the Lyrics category on the left. Click the Word Extensions button and deselect Use Smart Word Extensions. Editor’s note: a similar effect can be achieved using text expressions, which have the added benefit of pre-defined positioning and can be assigned using metatools. See the Finale user manual for more information on expressions.
Using Layers for Multiple, Simultaneous Parts
If you need multiple independent parts combined into a single staff, use layers. While this is a basic function, Finale helpfully determines stem direction based on the layer each part is written in: if there are multiple layers in a single measure, layer 1 stems will always point up and layer 2 stems will always point down. For this reason, always put the lower-pitched part in layer 2, even if it is the primary part, to make stems work out correctly. Additionally, using multiple layers allows parts to display the correct note durations. If possible, I avoid any more than two independent parts per staff at a time to allow for cleaner notation. If more are needed, I recommend adding an extra staff.
Creating Custom Percussion Layouts
Take full control over your battery, drum set, and auxiliary percussion by editing the percussion layouts manually. This enables you to adjust the shape of the notehead and placement on the staff of each sound or instrument. This is done via the ScoreManager. On the Instrument List tab, click the percussion instrument you want to edit and click the Settings button next to Notation Style. All available percussion maps are displayed; choose the appropriate instrument and click Edit…, or click Create… to make your own map. The Percussion Layout Designer dialog box allows you to adjust every percussion sound, location on the staff, and notehead. The + and – buttons allow you to add more sounds or remove sounds you don’t need. Click OK when you’re done and all your changes are applied to the score, including parts already written.
Adding Panache with the Resize Tool
One final (and completely optional) tool I use to make my music look a little more refined and customized is the Resize tool. Using the Resize tool, you can edit the size of individual notes, staves, or an entire page (this only affects the musical notation on the page, not the actual page size). I find parts look cleaner when they are slightly smaller than the default setting. Click on any part of a staff that is not a note (or between connected staves to affect an entire staff system) and a dialog box appears for changing the size. My preferred size is 85%, though I occasionally adjust that number for individual parts as needed to clean up or save pages. The slightly smaller size is still very readable but creates a bit more space on the page, allowing a cleaner look and more room for notes; this is especially helpful with battery parts that tend to have many rapid rhythms. It is a very subtle difference that makes a large impact over a full page.
Some Bonus Tips for Good “Measure”
- Marching battery stems should always point up. This can be adjusted in Staff > Edit Staff Attributes.
- Remove unnecessary staves from marimba or synthesizer grand staves when possible. If you have an entire system or page with an empty staff, this can be done using staff styles saving you time by avoiding excessive editing later. Choose the Staff tool, highlight the measures you want to hide, and right-click the selection. Choose Apply Staff Style to” > Current Part/Score… and select 13. Hide Staff (and Collapse). If you only need one staff for the marimba throughout the document, you can also use the Marimba [Treble Clef] instrument in the ScoreManager Instrument List instead of the usual grand staff Marimba instrument.
- Flams can be notated using grace notes in the Simple Entry tool or as an articulation. Actual grace notes play back correctly and their duration can be adjusted in Document Options – Grace Notes. The flam articulation, which in most documents can be found at slot 39, is helpful for quickly and consistently entering a large number of flams simultaneously, including by using the default “N” metatool.